I created this blog a while ago. It started as an assignment for school, evolved into a personal cooking blog, and now it's getting a little makeover. It's time that I start writing more often. Not only do I want to post more recipes, I want to share my personal thoughts, culinary adventures and Honolulu experiences with you. I hope to inspire you to try new things. Whether it's cooking a new dish, making a small life change, or facing a fear--anything counts!
So far, 2014 has been unexpectedly amazing. And I think it's only going to get better. I hope I can share some positive vibes and good eats with you!
Let the blogging begin.
Wednesday, February 12, 2014

Thursday, May 9, 2013
Chocolate Berry Mousse Cake (FINALS!)
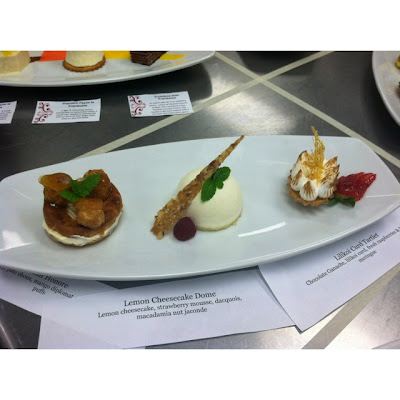
I made a chocolate berry mousse cake for my final. I also made three french pastries: lilikoi curd tart with italian meringue, lemon cheesecake dome and a mango saint honore. Yes, that was my final. I got to bake stuff. Whaaaaaat?! Yeah it's crazy (and awesome), because test taking simply sucks.
No bubble tests for me! (Aside from menu merchandising, but that's okay).
It's all over now and I couldn't be happier.
Wanna see my finals? ;)


No bubble tests for me! (Aside from menu merchandising, but that's okay).
It's all over now and I couldn't be happier.
Wanna see my finals? ;)


This was my final cake. What's inside?
Chocolate truffle
Black magic cake
Blackberry mousse
Dacquois
Vanilla mousse
White Chocolate mousse
And it's topped with chocolate glaze and an assortment of pretty thangs :)

These were my French pastries, (from left): Mango saint honore, lemon cheesecake dome (with strawberry mousse inside), lilikoi curd tart with torched Italian meringue
Overall, the final went well. We did have a little written test, too. I'm pleased with my grade and even more pleased now that the school year is over!
I'd love to show you how to construct my final mousse cake. I'll need to make a drawing or something! I swear, learning how to construct cakes like this has made my brain explode--with so many magical ideas! The possibilities are endless! So, I'll make sure to include a demo/full recipe soon :)
HAPPY SUMMER WORLD!
Sunday, April 28, 2013
Wine Gelée (Jello Shots With Class?)
Yesterday I volunteered with Cafe Laufer for St. Louis High School's wine fundraiser event. Different vendors were there offering various samplers for the guests. Cafe laufer prepared about 400-500 cups of white wine gelée. If you don't know what I'm talking about... it looks like this:


This is actually Cafe Laufer's "cake" version. I have yet to try it in cake form, but the gelée itself is surprisingly good!
I think it's such a beautiful dessert. The floating fruits in pristine gelée, something about it looks so refreshing--and it is definitely a refreshing dessert! I'd be happy to get this dessert any day!
You know what I found funny is how all the women reacted the same "ooh WINE!" Like it was the best idea they've ever heard! And men were like "meh..." when we told them it was a wine dessert. Guess it's not manly enough. I think someone should make a BEER gelée for all the dudes out there. These really are just like classy jello shots. I'm definitely going to experiment with this whole gelée thing...but I do know that alcohol content will mess with the amount of gelatin you'll need. So don't rely on the following recipe to work if you swap alcohols.
*Also, just a little concern, generally citrus fruits will make gelatin break down. So personally, I'd choose to put berries in my gelée. Strawberries, raspberries, blackberries and blueberries for sure.
Anyways, I told some people about the wine gelée and they were wondering how to make it. I did a little research and found a Martha Stewart recipe that looks pretty simple. So give it a shot and let me know how it goes.
 |
| Photo: Joseph De Leo |
This is what Martha's look like. She cut them up into jello squares. I think it would be cute to make these in little silicone molds!
Friday, April 26, 2013
Crème Brûlée (Recipe Included)
Crème brûlée...mmmmmmm...lil dishes full of fatty joy, topped with a crunchy layer of sugary goodness. They're surprisingly simple to make (with the exception for funky ovens). There are few ingredients required and a lot of flavor variations to experiment with.


Ingredients:
1 qt. heavy cream
2 vanilla beans (seeds scraped, all of it goes in)
3.25 oz sugar
12 egg yolks
3.25 oz sugar
That's that.
Now to make it:
- Preheat the oven to 325 degrees (F)
- Heat the first three ingredients in a medium saucepan
- In a separate medium size bowl, mix the egg yolks & second addition of sugar together with a whip (aka whisk)
- When the heavy cream mix reaches a boil, temper it into the egg mixture*
- Return everything back to the pot and cook on the stove for just a minute, constantly stirring
- Strain everything into a container with a spout-like thing...(we use a gallon measure), if you don't have one just strain it into a bowl and ghetto-scoop it into the dishes with a ladle.
- Set up your crème brûlée dishes on a sheet pan. You'll need a large container of ice & another container that will be used to pour water. And make sure the inside of your dishes are completely dry.
- Pour your strained mixture into the dishes until almost full (not too full though!)
- Now, gently fill the sheet pan with ice (arouuuund the crème brûlée dishes). If any water drops into a filled dish, dump it and redo...the water will ruin it.
- Remove air bubbles from the surfaces by using either a blowtorch (gently!) or paper towels.
- They're ready to go in the oven meow. Put them in the oven, now, pour water in the sheet pan over the ice.
- Bake for about 30 minutes. Make sure that there is always water in the sheet pan. Refill if needed. Check the doneness with your finger. They shouldn't jiggle, you should see that it set. If they jiggle, keep em in there. If the top is browning and they're still jiggly...turn the oven off and leave them in there. Check on them in 10 minutes.
- Take them out when they're done & chill
*Tempering: stream in hot liquid into eggs slowly (while mixing!) to avoid making scrambled eggs...putting hot into cold gently...yeah. Bein' real casual with the explanation, sorry.
And right before service: TORCHIN' TIME!
Bust out your little torch and a dish full of sugar. Sprinkle your dishes with sugar (don't just dump it on there) and go over the sugar with the torch. You'll see the transformation. Repeat 3x to get a nice caramelized crust.
Yeeee pretty easy!
Now, variations:
- Chocolate: add good quality chocolate into the heavy cream mixture when it's hot. There's no specific amount...but I recommend adding enough so that it looks pretty dark. Remember that you're going to be pouring that into a bunch of egg yolks. The color will lighten and you don't want to end up with a milk chocolate look--cause that's lame.
- Orange/lemon: add zest (~1-1.5 ea.) of desired citrus fruit into the heavy cream so that the oils can steep and the flavors will come out!
- Chocolate orange: put those two together ^^
- Ginger: add fresh chopped ginger into the heavy cream and let it steep
- You can pipe a little layer of ganache in the bottom of the dishes
- You can spread a little marmalade in the bottom of the dishes, too
- You can add halved berries in the bottom of the dishes
- You can add berries AND ganache to the bottom of the dishes
- ^^for those, just put the stuff in the bottom of the dishes & pour the mix right over
I think you get it, you can really do a lot with this...I really want to try making green tea crème brûlée but I haven't had experimenting time yet!
Oh yeah, and if you don't want to be a total fatty and eat all of this crème brûlée in one night, it can be saved in the fridge. I'd keep it in there for 3 days max. Just wrap it up and pour it into dishes when you want more!
Wednesday, April 24, 2013
Saint Honore (A French Pastry!)
Saint honore (saint on-oh-ree!)...I don't know, I butcher every French word that comes out of my mouth...but I don't actually butcher the pastry! My baking buddy, Mac, and I were instructed to make saint honore. At first it seemed super easy, and it was, until we got to caramelizing the decorative mini cream puffs. Never stick your fingers in a pot of molten sugar! I didn't, cause I'm smart, but Mac thought it would be quicker...so guess who got a sugar burn?
Anyways, that was just the first time we made it. Now we got it down! We're sugar dippin' mastas meow.


Imagine this: A disk of rolled out puff pastry with pate choux (eclair mix) piped around the edges. The pate choux puffs up, the puff pastry is nice and buttery, and the whole thing looks like a shiny golden donut. This is just the base. Now, that donut is cut in half, like how you would cut a bagel. And a hazelnut cream made of whipped cream, hazelnut paste (tastes like nutella!), and pastry cream, is sandwiched in the middle. The top goes back on and now the garnishings...mini cream puffs are filled with more cream. They are dipped in hot caramel sugar--top & bottom!--and are carefully glued to the edges of the pastry.
Okay maybe my description helped, maybe it didn't...but I'm sure these pictures will :)

Yum yum, see what I mean? They look like golden cream-filled donuts with caramel cream puffs! So pretty and shiny! I haven't gotten to eat one...but I certainly tasted everything along the way. I snuck a fair share of the mini caramel cream puffs...a chef-in-training is supposed know what her food tastes like, right? ;)
And now...check out this BIG MAMA
This mama goes by the name of gateau saint honore...basically, a cake-version! It's essentially the same thing, just bigger (the cream puffs, too!) and there is whipped cream for garnish.
I've actually never seen this pastry in a bakery. So keep an eye out and let me know if you ever see it! It's always cool to see different bakeries variations of a certain dessert. I'm actually trying to get inspiration for my final by looking at different bakeries online...hey and surprisingly YouTube had some good stuff. Check out this white chocolate flower here! (It's the one I used on my midterm cake.)
And for the near future, I'm hoping to make some ghetto-style cooking vids for whoever wants to watch. Because a lot of this stuff sounds fancy and complicated to make, but it really isn't. With a few modifications all of this stuff could be made at home! And I'll have some free time on my hands...so why not? Heheee.
Tuesday, April 23, 2013
Culinary School Love. (&baking production)
Maybe you know, maybe you don't...I am going to culinary school at KCC (Kapiolani Community College). The actual culinary school is called The Culinary Institute of the Pacific (I don't really get how that works). There are about 400-500 students in the culinary department and it continues to grow every year. It's only my first year at KCC, and next year will be my last. I can't express how happy KCC's culinary program has made me! I hate to admit it, but I was a little skeptical at first because it is at a community college. The inner college-snob in me came out for a minute. Growing up, I always hoped to go to Le Cordon Bleu, and this is no Cordon Bleu, but it's seriously an amazing school. We could use more ovens and equipment, but I think that's what makes this school much more like the real world. The staff is great, all of the "Chefs" share their personal work experiences with us and sincerely hope for our success. Not to mention the deal we're getting...I won't throw any numbers out there, but holy crap, my parents are saving a lot of money. Those private culinary schools are expensive! Oh and my favorite thing about the school? The sense of community! That wonderful feeling of belonging. It's been such a bonding experience, I feel like my classmates become family because we spend so much time together. Okay yeah, going on a rant...but I really do recommend this school to anyone who is interested in the culinary world!
So here is where I am in school: since the schedule is a little weird it can get confusing. Basically, I'm finishing my second semester in school. Overall, I finished four modules...so I guess you can say our "module" system is like the quarter system.
So here is where I am in school: since the schedule is a little weird it can get confusing. Basically, I'm finishing my second semester in school. Overall, I finished four modules...so I guess you can say our "module" system is like the quarter system.
I actually really like the module system. Everything is hands on so it feels like we're really moving along. Sometimes I wonder what it would be like if I was still sitting in lecture halls at UH Manoa...and it makes me SO grateful. I think I'd just explode into a big cloud of dust if I was still at UH. I couldn't wish for a better educational experience. Culinary school was definitely my calling! Not only am I learning about something that interests me, I'm also surrounded by people who feel the same way. We can discuss things in a way I never could with my other friends. Annnnd I think I'm actually liking pastry arts more than culinary arts as of now... :)
At the end of my fourth quarter I can say I've completed: fundamentals of cooking, intro to baking, intro to culinary, safety and sanitation, dining room service. And I'm currently taking intermediate baking and menu merchandising. Intermediate baking is pretty cool since we produce all of the desserts for our school's fine dining establishment, Ka Ikena.
I love the whole idea behind Ka Ikena. It's student run. So one class is in the back (Asian Pacific) kitchen cooking dinner, my class is downstairs preparing dessert, and another class is learning how to do fine dining--so they're actually serving and managing the restaurant. It's awesome to see how many people come to the restaurant to support the students and our culinary program. I just wish my friends and family from home were here to come eat!
And to make your eyeballs happy...check out some of the desserts we make!
Sorry, foodporn has become my life.
 |
| This is our dessert cart! We load this thing up with a bunch of desserts, as you can see here, and customers can browse and choose what they want after dinner. Everyone in my class is assigned a different dessert every week so we get a chance to do everything. |
 |
| This is our tiramisu. We make it in a cake ring (cake rings are the best! look into them!). Homemade lady finger disks are soaked in espresso syrup. Marscapone mix is then mixed and layered, one layer is plain and the second is coffee. The top is combed with an icing comb to get that cool effect when we sift cocoa over it. |
 |
| This is just pure amazing. Holy crap. Chocolate mousse (milk & dark) are layered with black magic cake. Chocolate glazed and garnished with a nice fruit bouquet. |
 |
| Tropical cheesecake! Lemon cheesecake with caramelized pineapple in it is poured over a yellow spongecake "crust." In the center there is a ring of fresh pink grapefruit & mango mousse layer, disguised with more cheesecake mix over the top. It is frozen to set and then garnished with candied lemon peel and fresh fruit. |
Sunday, April 21, 2013
Spring Cleaning!
Well this year has flown by...
Only 3 more weeks of class then it's summer time! But for the moment, I'm enjoying spring. I feel it in the air (literally, stupid allergies)!
Spring cleaning. Yup, I don't know why, but something about this time of the year makes me want to clean up and start fresh. So I was thinking about deleting this blog and starting a new one that I'll actually tend to. But instead, I'll make an effort to posting more often. And I think it'll be easier thanks to my shiny new MacBook Pro (thank you mom!).
Also! I'm feeling inspired to start whipping myself back into shape. Since the weather is so nice, I feel much more obligated to go outside. (Don't judge me, it isn't always sunny in Honolulu...) Damn you mousse cakes and opera tortes! Seriously though: sweets have become my life! I always thought that saying you are what you eat was so stupid, but now I get it, I turned into a muffin or something.
Oh and for those curious cats out there who might be wondering what my plans are with this culinary thing: I'm due to graduate with my AS in Pastry Arts Fall 2013! Then I will continue and get a certificate in Culinary Arts (if I have time to finish my AS in Culinary Arts, I'll do that!). So hopefully I'll be done with everything by Spring/Summer 2014. I feel like I'm on track to finish what I'm working towards and it feels awesome! I finally see the light at the end of the tunnel! But that's as far as it goes, don't ask me what I'm going to do after that...because shit, that's too scary. Real world, I'm not ready for you.
I don't know whether I'll stay here in Hawaii or if I'll return to Santa Cruz! I'm thinking I'll go home because there are more opportunities there, but who knows. I'm just going with the flow and so far I like where it's taking me :)
And here's a picture!

Only 3 more weeks of class then it's summer time! But for the moment, I'm enjoying spring. I feel it in the air (literally, stupid allergies)!
Spring cleaning. Yup, I don't know why, but something about this time of the year makes me want to clean up and start fresh. So I was thinking about deleting this blog and starting a new one that I'll actually tend to. But instead, I'll make an effort to posting more often. And I think it'll be easier thanks to my shiny new MacBook Pro (thank you mom!).
Also! I'm feeling inspired to start whipping myself back into shape. Since the weather is so nice, I feel much more obligated to go outside. (Don't judge me, it isn't always sunny in Honolulu...) Damn you mousse cakes and opera tortes! Seriously though: sweets have become my life! I always thought that saying you are what you eat was so stupid, but now I get it, I turned into a muffin or something.
Oh and for those curious cats out there who might be wondering what my plans are with this culinary thing: I'm due to graduate with my AS in Pastry Arts Fall 2013! Then I will continue and get a certificate in Culinary Arts (if I have time to finish my AS in Culinary Arts, I'll do that!). So hopefully I'll be done with everything by Spring/Summer 2014. I feel like I'm on track to finish what I'm working towards and it feels awesome! I finally see the light at the end of the tunnel! But that's as far as it goes, don't ask me what I'm going to do after that...because shit, that's too scary. Real world, I'm not ready for you.
I don't know whether I'll stay here in Hawaii or if I'll return to Santa Cruz! I'm thinking I'll go home because there are more opportunities there, but who knows. I'm just going with the flow and so far I like where it's taking me :)
And here's a picture!

Yep midterms have already happened! This was mine.
A lot of people ask me how tests work in culinary school. For my particular baking class, we have practical exams, where we make a cake with certain requirements or something like that. Then we also have written tests, too. That cake up there^^^ was my midterm cake. We were required to make an 8x2" cake with 6 different competencies.
I made a chocolate-berry themed cake, and it had maybe 7 competencies in it?
- Chocolate sponge cake
- Black magic cake (moist chocolate cake)
- Raspberry pate fruit (a layer of jelly candy)
- Chambord ganache
- Raspberry mousse
- Blackberry dark chocolate mousse
- Dacquois (crispy hazelnut cookie)
Overall, I was happy with the final appearance. However, the sponge cake was way too try and the pate fruit was a little too thick. Got a 99% though so I can't complain :)
Tuesday, March 5, 2013
Breakfast Love
I love breakfast. I really do. Mostly for the sugary treats. If you really know me...you'll know I have a pancake problem. A chocolate chip pancake problem. It's become a tradition in my life actually. Tom and I make chocolate chip pancakes every Sunday morning. I don't know if I could go a Sunday without them!
We've even experimented with some bacon. Bacon + chocolate + pancakes + maple syrup = holy crap! DELICIOUS. Salty, sweet, fluffy, crispy, gooey. It's truly ideal. Adventure time even has a song about it. Chocolate chips aren't mentioned, but they should be.
Okay, off topic! I'm here to talk about waffles right now, not pancakes! See, I'd love to make waffles...but I don't have a waffle iron!
If you're fortunate enough to own a waffle iron. You should really try out some of these recipes here. Just another good food find on the interwebz.
Oh myyy waffles can be savory, healthy, sweet, dessert, the list goes on. I don't know about you, but I'd love to try the red velvet waffles. The "cream cheese syrup" looks interesting. Definitely gonna test that one out when I have access to a waffle iron!
Aight. Just wanted to share some waffle lovin' with you. So go cook yo waffles. Bye!
We've even experimented with some bacon. Bacon + chocolate + pancakes + maple syrup = holy crap! DELICIOUS. Salty, sweet, fluffy, crispy, gooey. It's truly ideal. Adventure time even has a song about it. Chocolate chips aren't mentioned, but they should be.
Okay, off topic! I'm here to talk about waffles right now, not pancakes! See, I'd love to make waffles...but I don't have a waffle iron!
If you're fortunate enough to own a waffle iron. You should really try out some of these recipes here. Just another good food find on the interwebz.
Oh myyy waffles can be savory, healthy, sweet, dessert, the list goes on. I don't know about you, but I'd love to try the red velvet waffles. The "cream cheese syrup" looks interesting. Definitely gonna test that one out when I have access to a waffle iron!
Aight. Just wanted to share some waffle lovin' with you. So go cook yo waffles. Bye!
Monday, March 4, 2013
Yellow Chiffon Cake.

Specifically, where I'm going with this is cakes. There are tons of different cake recipes. Special cakes have special names. It can get pretty confusing. I'll try to keep this simple though. Chiffon cake. The chiffon method is a special method that I've become fond of. We made a lot of chiffon cakes in class. They're simple, very versatile, and tasty cakes. They aren't very dense and I like that. The reason they aren't dense is because air (and baking powder) is the leavening agent.
The method goes something like this:
- Make a meringue (egg whites, cream of tartar, sugar)
- Make a batter
- Fold the meringue into the batter & bake right away
So here, yellow chiffon cake:
Ingredients:
5 egg whites
2.5 oz sugar
pinch of cream of tartar
4 oz cake flour
1.5 tsp baking powder
1/8 tsp salt
2 oz sugar
1/4 C salad oil
5 egg yolks (keep the whites!)
1/3 C water
1/2 tsp vanilla extract
*Note: ingredients should be room temperature.
 |
| Nice n fluffy |
Procedure:
- Preheat oven 350 degrees F. Prepare 8" cake pan (parchment round on bottom, ungreased).
- Set up a mixer (clean bowl & whip--aka whisk--attachment)
- Whip egg whites in mixer on highest speed until they form soft peaks. Add cream of tartar and sugar. Whip until firm (but not too firm!), moist peaks.
- Scrape out whipped egg whites (meringue) into another bowl and set aside.
- In the same (egg-whitey) mixing bowl, sift flour, baking powder, salt, & sugar. Put the bowl back on the mixer, but use a paddle attachment now.
- Turn mixer to second speed & gradually stream in the oil. Then add egg yolks one at a time (remember to stop and scrape down the bowl, this batter should be smooooooth).
- Stream in water, then vanilla. Keep scrapin' the bowl.
- Now, take the meringue you prepared earlier. Scoop out about a quarter of the meringue and fold it into the batter.
- Keep adding meringue & folding. Try to do this somewhat fast. Don't over mix! The fluffy air from the meringue is what makes this cake so light and nice.
- When everything is combined, pour batter into the prepared pan and bake for about 35-40 minutes, or until toothpick comes out clean. Or! If you press the top of the cake gently and it springs back, it's done.
- Flip the hot cake upside down onto a sheet pan with parchment paper.
- When it's cool, run an offset spatula around the outside and pop out of the pan :)
Woo! Chiffon cake! Next time I'll give you a strawberry shortcake...layering tutorial? Or an attempt at explaining the procedure. Yay!
Sunday, March 3, 2013
Back to Basics (Pastry Cream).
I'm going to share with you some of the basics I learned in Intro to Baking.
Pastry cream is such an important basic to know in patisserie. It's very very basic, so if you wanted, you could add chocolate, coffee, liqueurs -it can be transformed! It's used to fill cakes, pastries, you can really get creative with it. It's also easily made into diplomat (a 50/50 mix of whipped cream & pastry cream). We used diplomat in class to fill strawberry shortcake. We had a nice layer of diplomat with fresh chopped strawberries in it. Yum!
Yup yup pastry cream, it's easy to make. All you really need to know is how to temper something. Tempering goes a little like this: you heat liquid over the stove in a saucepan and in a separate bowl you have some eggs or egg yolks (maybe mixed with other things, depending on what you're making). You need to slooowly stream in about half of the hot liquid into the eggs while mixing. Then you can add the egg/milk mix back with the rest of the hot milk. It can go back on the heat now. It's like you want the eggs and milk to reach an equilibrium so that the eggs don't cook (yuck, scrambled eggs). Yeah, so that's tempering. Easy peasy.

Creme Patisserie (Pastry Cream)
Ingredients:
2 C milk
2 oz sugar
2 oz sugar
1.5 oz cornstarch
1 egg yolk
3 whole eggs
1.5 t vanilla extract
1 oz butter
Procedure:
Pastry cream is such an important basic to know in patisserie. It's very very basic, so if you wanted, you could add chocolate, coffee, liqueurs -it can be transformed! It's used to fill cakes, pastries, you can really get creative with it. It's also easily made into diplomat (a 50/50 mix of whipped cream & pastry cream). We used diplomat in class to fill strawberry shortcake. We had a nice layer of diplomat with fresh chopped strawberries in it. Yum!
Yup yup pastry cream, it's easy to make. All you really need to know is how to temper something. Tempering goes a little like this: you heat liquid over the stove in a saucepan and in a separate bowl you have some eggs or egg yolks (maybe mixed with other things, depending on what you're making). You need to slooowly stream in about half of the hot liquid into the eggs while mixing. Then you can add the egg/milk mix back with the rest of the hot milk. It can go back on the heat now. It's like you want the eggs and milk to reach an equilibrium so that the eggs don't cook (yuck, scrambled eggs). Yeah, so that's tempering. Easy peasy.
Creme Patisserie (Pastry Cream)
Ingredients:
2 C milk
2 oz sugar
2 oz sugar
1.5 oz cornstarch
1 egg yolk
3 whole eggs
1.5 t vanilla extract
1 oz butter
Procedure:
- Prep an ice bath: you need two bowls, one larger than the other. Fill the large bowl with some ice and rest the smaller bowl inside over the ice. Also have plastic wrap ready.
- In a medium saucepan, heat milk & sugar. Heat until you see steam, mix the milk so it doesn't burn.
- In a medium sized bowl, sift sugar and cornstarch into the eggs and mix together.
- When the milk is hot, temper it into the eggs (~1/2-1/3 of the milk).
- Return the mix back into the pot with remaining milk & put back on the heat (medium/high heat). Continuously mix until it thickens. This should only take a few minutes.
- Remove from the heat and mix in vanilla & butter.
- If the pastry cream is lumpy, you can strain it. Strain it into the prepared bowl in the ice bath.
- Immediately cover the surface with plastic wrap so that a skin doesn't develop on the pastry cream. Make sure it's chilled in an ice bath.
Viola! Simple, right? Now all you need is some pate choux and you've got eclairs or cream puffs ;)
Wednesday, February 27, 2013
I'm back!
Hello! Sorry for the delay! Life has gotten pretty hectic lately. Finally things are slowing down. In the past month I had my first baking job (that's right, HAD). And it's already the end of my Introduction to Baking class.
You might be wondering about this baking job. I worked in a cupcake store as an assistant baker. Basically, my job was to measure things out, sift, clean, make frostings and little things, it was a great beginning baking job. The downside was that I had to wake up at 5am, worked from 6am til 2pm then went straight to school after (3-9pm). It was craziness. Honestly, it was a good job! My coworkers were kind of quirky like me and my boss was a sweetheart. I can't deny my fear of the large amount of estrogen in the room though...it was dangerous. Anyways! That's done. I learned a lot in the whole month I worked in there, ha! For now, while I'm in school, I don't think I can handle another job like that...I'm going to look for a more mellow job.
Intro to baking is almost done, but that's not a huge deal because I'm continuing to Intermediate Baking! Same teacher, some of the same classmates, so I think it'll be fun. I'm ready to move onto bigger and better things.
As far as recipes go on my lil blog baby...I'm working on posting some new ones! I think from now on though, I'm sorry to say, I will post the recipes in ounces & lbs. Real baker style. If you prefer cups and things, you can convert--trust me it's simple. If I can do it, anyone can do it. Seriously, I finished my math career in high school with algebra 2 (and I barely passed).
Woo! So look forward to some good baking recipes!
Oh, and here's a cool thing I found on Pinterest:

You might be wondering about this baking job. I worked in a cupcake store as an assistant baker. Basically, my job was to measure things out, sift, clean, make frostings and little things, it was a great beginning baking job. The downside was that I had to wake up at 5am, worked from 6am til 2pm then went straight to school after (3-9pm). It was craziness. Honestly, it was a good job! My coworkers were kind of quirky like me and my boss was a sweetheart. I can't deny my fear of the large amount of estrogen in the room though...it was dangerous. Anyways! That's done. I learned a lot in the whole month I worked in there, ha! For now, while I'm in school, I don't think I can handle another job like that...I'm going to look for a more mellow job.
Intro to baking is almost done, but that's not a huge deal because I'm continuing to Intermediate Baking! Same teacher, some of the same classmates, so I think it'll be fun. I'm ready to move onto bigger and better things.
As far as recipes go on my lil blog baby...I'm working on posting some new ones! I think from now on though, I'm sorry to say, I will post the recipes in ounces & lbs. Real baker style. If you prefer cups and things, you can convert--trust me it's simple. If I can do it, anyone can do it. Seriously, I finished my math career in high school with algebra 2 (and I barely passed).
Woo! So look forward to some good baking recipes!
Oh, and here's a cool thing I found on Pinterest:

Sunday, January 20, 2013
How Sweet It Is
When I think of pie, I think of my brother (and these little egg dudes). He is the pie master. However, I think by the time I finish my fundamentals of baking course...I'll be able to win a pie throw down against him. Wham! Just like Bobby Flay. Nah, kidding! Kind of. But anyways, I'm two weeks into my Fundamentals of Baking class and I'm stoked! We've made chiffon pie, cream pie, apple pie, French silk pie...I feel like Bubba Gump naming all of the pies. But seriously, life has been a baking fiesta lately.
Let me share with you what I've made so far in the past two weeks.
First off, the pies:


First off, the pies:
 |
| French Silk Pie |
 |
| French Silk topped with ganache |
 |
| Lemon Meringue |
 |
| Apple pie topped with struesel. Yeah, it's not the cutest. But it tasted good...anything with struesel is AMAZING. Butter, sugar, flour and cinnamon. How can you go wrong with that? |
 |
| Vanilla cream pie with ganache on the bottom and layers of fresh strawberries. Yum! |
Now, check out this otha stuff:
 |
| Fruit tartlets |
 |
| Sour cream muffins |
 |
| Chocolate chip cookie dough |
 |
| Soft rolls (bench proofing) |
 |
| Finished soft rolls |
 |
| Yellow chiffon cake in the making |
Wednesday, December 26, 2012
Christmas Ribs!
It's been a while!
Everything's been super hectic due to the holidays! Visitors, old friends, family, last minute shopping, mini trips, eating food from restaurants I missed so dearly, catching up with sleep...I've been having a good time. And as you all know, yesterday was Christmas! I hope you had a good one :) This year I had the honor of making Christmas dinner for the family. This was a good thing because a) my mom didn't need to panic about the food b) my awesome boyfriend was there to help and support c) I got to choose what we ate. So I chose RIBS. Christmas turkey is overrated. Thanksgiving is turkey day, not Christmas. Who else out there agrees with me?
Oh, and on a side note...the ribs come with a funny story. The temperature change for me has been rough. Going from the 80s to 50s isn't easy for me. So I mostly rely on my old high school sweats (I have no reason to buy new winter clothes when I'm living in Hawaii!). And yeah, I'm well aware that I look like a slob most of the time. But whatever, I'm in Santa Cruz. Yoga pants, hoodies, and Ugg boots are usually good enough. So I walk up to the butcher counter at New Leaf wearing my baggy bright red sweatpants, an old blue Santa Cruz High swim hoodie, and my well-used Ugg boots. I ask him how much three racks of ribs would be. They're around 50$. Expensive! At least from a college student's perspective. So I hesitate and go for two racks. He wraps them up and hands them to me. "Merry Christmas, I threw some extra's in there," he says to me, sounding real nice and genuine. I didn't stop to think about that until I got home. So when I get home and unwrap them I realized he threw in an entire free rack of ribs. Score! But why? I'm assuming the butcher felt bad for me because I looked like a sad little girl in hobo clothes who just wanted some good quality ribs for Christmas. Little did he know, I'm no hobo, I'm just super lazy. I guess, sometimes, laziness pays off.
Anyways, Merry Christmas nice butcher man! You have some good karma coming your way!
And thanks to my new culinary skills (thank you Chef Leake!) I made some delicious Christmas ribs. Along with honey glazed sweet potatoes, sauteed chard, roasted garlic & chive mashed potatoes, and a yummy salad with homemade dressing.

The recipes are fairly simple. Pictures might not even be needed!
Honey Glazed Sweet Potatoes
Preheat your oven to 375 F degrees. I bought a pre-weighed bag of yams from Trader Joe's. But use however many you need. Cut them up into 1-2" dice (the smaller, the quicker they'll cook!). Keep them in cool water to prevent them from changing color. When you're ready to cook, drain the potatoes from the cold water and put in a large bowl. Squeeze honey over the potatoes to coat them, along with a generous drizzle of olive oil. Sprinkle cinnamon over the top (use your judgement) and fresh ground salt and pepper. Toss the potatoes and make sure they're all coated. Use two foil-lined sheet pans, spread the potatoes out on the sheet pans and pop in the oven for around 30 minutes.
Easy Salad & Dressing Recipe
I bought a bag of baby arugula (yummy and peppery!) and bag of baby spinach. Mix the two greens together in a large bowl. Add a big handful or two of roasted sunflower seeds. For the cheese I chose ricotta salata (pre crumbled from Trader Joe's), it is SO good...if you've never tried it, try it. It's texture is comparable to feta, because it is crumbly, but it's not salty like feta and it has a smoother mouth feel. I cut up some little grape tomatoes and put those in there, too.
For the dressing, pour about 1/2 a cup (maybe a little more) balsamic vinegar into a bowl. Whisk it up & slooooowly drizzle in extra virgin olive oil until the mixture is thick, like chocolate sauce consistency! Now, grab some honey and drizzle a little in there to taste. Mince two garlic cloves and mix that in there, too. Finally, use fresh cracked pepper and a sprinkle of sea salt to finish it off.
Toss the salad with the dressing right before service! Yum :)
Now for the...RIBS!

Ingredients:

Everything's been super hectic due to the holidays! Visitors, old friends, family, last minute shopping, mini trips, eating food from restaurants I missed so dearly, catching up with sleep...I've been having a good time. And as you all know, yesterday was Christmas! I hope you had a good one :) This year I had the honor of making Christmas dinner for the family. This was a good thing because a) my mom didn't need to panic about the food b) my awesome boyfriend was there to help and support c) I got to choose what we ate. So I chose RIBS. Christmas turkey is overrated. Thanksgiving is turkey day, not Christmas. Who else out there agrees with me?
Oh, and on a side note...the ribs come with a funny story. The temperature change for me has been rough. Going from the 80s to 50s isn't easy for me. So I mostly rely on my old high school sweats (I have no reason to buy new winter clothes when I'm living in Hawaii!). And yeah, I'm well aware that I look like a slob most of the time. But whatever, I'm in Santa Cruz. Yoga pants, hoodies, and Ugg boots are usually good enough. So I walk up to the butcher counter at New Leaf wearing my baggy bright red sweatpants, an old blue Santa Cruz High swim hoodie, and my well-used Ugg boots. I ask him how much three racks of ribs would be. They're around 50$. Expensive! At least from a college student's perspective. So I hesitate and go for two racks. He wraps them up and hands them to me. "Merry Christmas, I threw some extra's in there," he says to me, sounding real nice and genuine. I didn't stop to think about that until I got home. So when I get home and unwrap them I realized he threw in an entire free rack of ribs. Score! But why? I'm assuming the butcher felt bad for me because I looked like a sad little girl in hobo clothes who just wanted some good quality ribs for Christmas. Little did he know, I'm no hobo, I'm just super lazy. I guess, sometimes, laziness pays off.
Anyways, Merry Christmas nice butcher man! You have some good karma coming your way!
And thanks to my new culinary skills (thank you Chef Leake!) I made some delicious Christmas ribs. Along with honey glazed sweet potatoes, sauteed chard, roasted garlic & chive mashed potatoes, and a yummy salad with homemade dressing.
The recipes are fairly simple. Pictures might not even be needed!
Honey Glazed Sweet Potatoes
Preheat your oven to 375 F degrees. I bought a pre-weighed bag of yams from Trader Joe's. But use however many you need. Cut them up into 1-2" dice (the smaller, the quicker they'll cook!). Keep them in cool water to prevent them from changing color. When you're ready to cook, drain the potatoes from the cold water and put in a large bowl. Squeeze honey over the potatoes to coat them, along with a generous drizzle of olive oil. Sprinkle cinnamon over the top (use your judgement) and fresh ground salt and pepper. Toss the potatoes and make sure they're all coated. Use two foil-lined sheet pans, spread the potatoes out on the sheet pans and pop in the oven for around 30 minutes.
Easy Salad & Dressing Recipe
I bought a bag of baby arugula (yummy and peppery!) and bag of baby spinach. Mix the two greens together in a large bowl. Add a big handful or two of roasted sunflower seeds. For the cheese I chose ricotta salata (pre crumbled from Trader Joe's), it is SO good...if you've never tried it, try it. It's texture is comparable to feta, because it is crumbly, but it's not salty like feta and it has a smoother mouth feel. I cut up some little grape tomatoes and put those in there, too.
For the dressing, pour about 1/2 a cup (maybe a little more) balsamic vinegar into a bowl. Whisk it up & slooooowly drizzle in extra virgin olive oil until the mixture is thick, like chocolate sauce consistency! Now, grab some honey and drizzle a little in there to taste. Mince two garlic cloves and mix that in there, too. Finally, use fresh cracked pepper and a sprinkle of sea salt to finish it off.
Toss the salad with the dressing right before service! Yum :)
Now for the...RIBS!
- Pork baby back ribs (however many racks you want, I could fit two into my pot)
- Pickling spices, about 1/8 cup (I looked up how to make my own, easy!)
- Dry rub (store bought or homemade); I made mine out of brown sugar, black pepper, white pepper, garlic powder, cayenne, allspice, chili powder, paprika, dry mustard, and salt
- BBQ sauce (again, store bought or homemade!), I almost used a whole bottle
Instructions:
- In your largest pot (and I mean GRANDE), fill with water and the pickling spices then place over high heat.
- While waiting for the water to boil, cut your racks of ribs in half. Find a bone in the middle of each rack and cut along that bone.
- When the water is boiling, add the ribs. Cover the pot and reduce the heat down to a simmer.
- Cook the ribs in the pot of water and spices for about 40-60 minutes (my racks were fairly small so I went 40 minutes).
- While you're waiting, you can go ahead and make your dry rub.
- Remove the ribs from the pot and set on a sheet pan to cool. Also, preheat your oven to 400 F degrees.
- When the ribs are cool enough to touch, sprinkle the dry rib on and massage it in there (do both sides!). There shouldn't be any chunks of the dry rub, brush them off. You don't want to bite into a big chunk of dry spice rub...yuck.
- Use two (more or less, depending on how many you're making) foil-lined cookie sheets to put your ribs on. Then pop them in the oven for 7 minutes.
- After 7 minutes, take them out, flip them over & bake for another 7 minutes.
- Now it's saucy time! Start with the service side down (the meaty side!), use a small spoon to spread around the BBQ sauce. Don't use huge globs. There should be a nice coating on the ribs, but not huge mouthfuls of sauce. Make sure to cover all of the exposed meat. Pop them in the oven, service side down for 10 minutes.
- Take the ribs out of the oven. Flip them over so they're service side up (the meaty goodness side) and sauce them with your spoon. Put them in the oven for 10 minutes. WOOO RIBS. Done! If you want them a little charred, you can put them under the broiler for a few minutes.
The meat should be tender and fall right off of the bones. Omnomnommm!
*Note: ribs can be cooked a lot of different ways! This is the way I learned how to do it in culinary school and I was pleased :) it's a good method to use when you want ribs but it's too rainy outside to barbecue.
Nommmm away :)
Tuesday, December 11, 2012
Good Stumblin' Finds
I have a few days left to kill before I fly home. I don't have much to do, so I woke up at 11:30am today...and the only thing I have planned is to go to kickboxing later. I'm not complaining, though, I'm loving the freedom. I can watch Grey's Anatomy for hours, sleep when I please, and go lurk around wherever I want, when I want. And the best part is I HAVE ENERGY! Woohoo! But for now, I'm stumbling on stumbleupon. I discovered this wonderful procrastination tool my freshman year of college. Pretty entertaining stuff!
Oh, the lazy life...
Here's some good stuff I found:
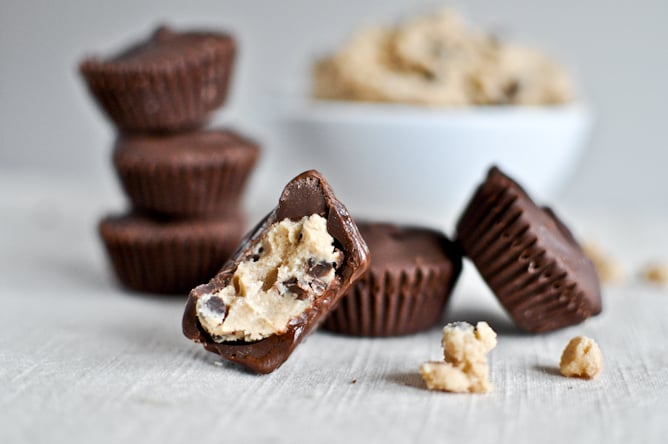
Chocolate Chip Peanut Butter Cups

Cute animals!
Videos & pictures. Look! I promise it will make you smile :)


Oh, the lazy life...
Here's some good stuff I found:
Chocolate Chip Peanut Butter Cups
Cute animals!
Videos & pictures. Look! I promise it will make you smile :)
Just cause it's almost 2013
Some of the ideas are pretty cool!
Here are a few examples:


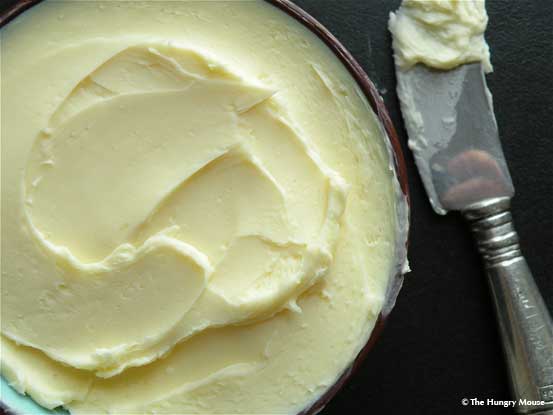
You could add herbs and all kinds of stuff to it! Fancy butta.
Probably tastes way better than store bought butter.
Hope that entertained you like it entertained me!
Sunday, December 9, 2012
Coconut oil shortbread "tart" with honey almond glaze
Happy Sunday! It's baking day!
.jpeg)
Today I made an adapted version of "fifteen spatula's" recipe called Bee Sting Bars.
It's basically a buttery, melt-in-your-mouth shortbread covered with honey almond glaze. The original recipe has you make it like cookie bars or something. But I used a spring form pan. It gives it a nicer presentation!
Ingredients (shortbread):
.jpeg)

.jpeg)
.jpeg)
.jpeg)
.jpeg)
.jpeg)
.jpeg)
.jpeg)
.jpeg)
.jpeg)
.jpeg)
.jpeg)
.jpeg)
.jpeg)
.jpeg)
.jpeg)
.jpeg)
.jpeg)
.jpeg)
.jpeg)
.jpeg)
.jpeg)
.jpeg)

.jpeg)
.jpeg)
.jpeg)
.jpeg)
Today I made an adapted version of "fifteen spatula's" recipe called Bee Sting Bars.
It's basically a buttery, melt-in-your-mouth shortbread covered with honey almond glaze. The original recipe has you make it like cookie bars or something. But I used a spring form pan. It gives it a nicer presentation!
Ingredients (shortbread):
- 6 Tbsp. coconut oil
- 6 Tbsp. butter, room temperature
- 7.4oz AP flour*
- 1.1oz whole wheat flour *
- Sea salt
- 1/2 Tsp. vanilla extract (or almond)
*1 3/4 C flour. If you don't want to deal with weighing out ingredients just use this measurement. Use whatever kind of flour you want. I ran out of AP flour so I used some whole wheat flour, too.
Ingredients (glaze):
- 6 Tbsp. butter
- 2 Tbsp. honey
- 3 Tbsp. sugar
- 1/4 Tsp. almond extract
- 1 Tsp. vanilla extract
- 1 1/2 C sliced almonds
You also need:
- 9" round spring form pan
- rubber spatula/wooden spoon
- mixing bowl
- an oven
- measuring spoons
- measuring cups
- optional: a scale
Alright, first off we gotta make the shortbread!
So grab a mixing bowl, rubber spatula, the butter and coconut oil.
Put the coconut oil & butter in the mixing bowl and mix together until there are no (or very few) lumps.
.jpeg) |
| Yeah, it's a little chunky. But that's okay. Nobody's perfect yo. |
Next, add that sugar!
Then the vanilla.
Then a few grinds of sea salt (or a hefty pinch)!
Flour time yo! Measure it out however you want to. I used my pretty kitchen scale :)
Mix the flour in there until incorporated. It'll look crumbly, that's good.
Bust out your spring form pan and pour the crumbly mix in there. Press in with your hands.
When it's all pressed in there, pop it in the fridge for 30 minutes or so. I had it in there for 45...so I could watch an episode of Grey's Anatomy :) hehe. But yeah start to preheat your oven to 350F degrees during this time!
Falalalalalalalalaaaaaaa
When it's getting close to the end of your 30 minute refrigeration time.
Get prepared and make yo honey almond glaze.
The topping is easy.
Gather all of your ingredients.
Some up-close shots of the honey, almond extract, and almonds I used:
So just dump it all in a saucepan. Let everything melt and get all happy in there. Cook over a medium-high flame. (Or if you're using electric, medium-high heat). Bring it to a simmer for two minutes.
Take the shortbread out of the refrigerator. And dump this gooey goodness on top.
Spread it around.
Pop it in the oven!
Cook for about 20 minutes.
It took more like 26 more minutes for mine to cook.
How do you know when it's done? The top should turn more golden brown.
You can probably see the difference in my pictures. Check them if you aren't sure.
Take your treats out of the oven when done :)
Let them cook on the counter for a bit. You still have to take off the outside part of your spring form pan...if you do that when it's piping hot you could easily burn yourself. So be patient! Read a book or something. Do some jumping jacks. Seriously, these are full of buttery goodness....you might feel better if you do some jumping jacks...
When it's cooled. Unlatch the spring form pan and push from the bottom up to release the shortbread. Be careful! Don't drop it! Wahhh that would be sad!
Now look at that beauty :)
Yum yum yummmmay
Lookin' gewwwwd.
Make sure to share!
Subscribe to:
Posts (Atom)