Tuesday, March 5, 2013

Breakfast Love

I love breakfast. I really do. Mostly for the sugary treats. If you really know me...you'll know I have a pancake problem. A chocolate chip pancake problem. It's become a tradition in my life actually. Tom and I make chocolate chip pancakes every Sunday morning. I don't know if I could go a Sunday without them!

We've even experimented with some bacon. Bacon + chocolate + pancakes + maple syrup = holy crap! DELICIOUS. Salty, sweet, fluffy, crispy, gooey. It's truly ideal. Adventure time even has a song about it. Chocolate chips aren't mentioned, but they should be.


Okay, off topic! I'm here to talk about waffles right now, not pancakes! See, I'd love to make waffles...but I don't have a waffle iron!

If you're fortunate enough to own a waffle iron. You should really try out some of these recipes here. Just another good food find on the interwebz.

Oh myyy waffles can be savory, healthy, sweet, dessert, the list goes on. I don't know about you, but I'd love to try the red velvet waffles. The "cream cheese syrup" looks interesting. Definitely gonna test that one out when I have access to a waffle iron!

Aight. Just wanted to share some waffle lovin' with you. So go cook yo waffles. Bye!

Monday, March 4, 2013

Yellow Chiffon Cake.


In culinary school (patisserie side) you learn a lot of different methods. Methods, terminology, everything is very exact for baking. It's not the same as cooking. There is room for experimentation, you just have to do it right. You gotta use the methods.

Specifically, where I'm going with this is cakes. There are tons of different cake recipes. Special cakes have special names. It can get pretty confusing. I'll try to keep this simple though. Chiffon cake. The chiffon method is a special method that I've become fond of. We made a lot of chiffon cakes in class. They're simple, very versatile, and tasty cakes. They aren't very dense and I like that. The reason they aren't dense is because air (and baking powder) is the leavening agent.

The method goes something like this:
  1. Make a meringue (egg whites, cream of tartar, sugar)
  2. Make a batter 
  3. Fold the meringue into the batter & bake right away 
So here, yellow chiffon cake:

Ingredients:
5 egg whites
2.5 oz sugar
pinch of cream of tartar

4 oz cake flour
1.5 tsp baking powder
1/8 tsp salt
2 oz sugar

1/4 C salad oil
5 egg yolks (keep the whites!)
1/3 C water
1/2 tsp vanilla extract

*Note: ingredients should be room temperature.

Nice n fluffy


Procedure: 
  1. Preheat oven 350 degrees F. Prepare 8" cake pan (parchment round on bottom, ungreased). 
  2. Set up a mixer (clean bowl & whip--aka whisk--attachment) 
  3. Whip egg whites in mixer on highest speed until they form soft peaks. Add cream of tartar and sugar. Whip until firm (but not too firm!), moist peaks. 
  4. Scrape out whipped egg whites (meringue) into another bowl and set aside. 
  5. In the same (egg-whitey) mixing bowl, sift flour, baking powder, salt, & sugar. Put the bowl back on the mixer, but use a paddle attachment now. 
  6. Turn mixer to second speed & gradually stream in the oil. Then add egg yolks one at a time (remember to stop and scrape down the bowl, this batter should be smooooooth). 
  7. Stream in water, then vanilla. Keep scrapin' the bowl. 
  8. Now, take the meringue you prepared earlier. Scoop out about a quarter of the meringue and fold it into the batter. 
  9. Keep adding meringue & folding. Try to do this somewhat fast. Don't over mix! The fluffy air from the meringue is what makes this cake so light and nice. 
  10. When everything is combined, pour batter into the prepared pan and bake for about 35-40 minutes, or until toothpick comes out clean. Or! If you press the top of the cake gently and it springs back, it's done. 
  11. Flip the hot cake upside down onto a sheet pan with parchment paper. 
  12. When it's cool, run an offset spatula around the outside and pop out of the pan :) 
Woo! Chiffon cake! Next time I'll give you a strawberry shortcake...layering tutorial? Or an attempt at explaining the procedure. Yay! 

Sunday, March 3, 2013

Back to Basics (Pastry Cream).

I'm going to share with you some of the basics I learned in Intro to Baking.

Pastry cream is such an important basic to know in patisserie. It's very very basic, so if you wanted, you could add chocolate, coffee, liqueurs -it can be transformed! It's used to fill cakes,  pastries, you can really get creative with it. It's also easily made into diplomat (a 50/50 mix of whipped cream & pastry cream). We used diplomat in class to fill strawberry shortcake. We had a nice layer of diplomat with fresh chopped strawberries in it. Yum!

Yup yup pastry cream, it's easy to make. All you really need to know is how to temper something. Tempering goes a little like this: you heat liquid over the stove in a saucepan and in a separate bowl you have some eggs or egg yolks (maybe mixed with other things, depending on what you're making). You need to slooowly stream in about half of the hot liquid into the eggs while mixing. Then you can add the egg/milk mix back with the rest of the hot milk. It can go back on the heat now. It's like you want the eggs and milk to reach an equilibrium so that the eggs don't cook (yuck, scrambled eggs). Yeah, so that's tempering. Easy peasy.


Creme Patisserie (Pastry Cream)

Ingredients: 
2 C milk
2 oz sugar

2 oz sugar
1.5 oz cornstarch
1 egg yolk
3 whole eggs

1.5 t vanilla extract
1 oz butter

Procedure: 

  1. Prep an ice bath: you need two bowls, one larger than the other. Fill the large bowl with some ice  and rest the smaller bowl inside over the ice. Also have plastic wrap ready. 
  2. In a medium saucepan, heat milk & sugar. Heat until you see steam, mix the milk so it doesn't burn. 
  3. In a medium sized bowl, sift sugar and cornstarch into the eggs and mix together. 
  4. When the milk is hot, temper it into the eggs (~1/2-1/3 of the milk).
  5. Return the mix back into the pot with remaining milk & put back on the heat (medium/high heat). Continuously mix until it thickens. This should only take a few minutes. 
  6. Remove from the heat and mix in vanilla & butter. 
  7. If the pastry cream is lumpy, you can strain it. Strain it into the prepared bowl in the ice bath. 
  8. Immediately cover the surface with plastic wrap so that a skin doesn't develop on the pastry cream. Make sure it's chilled in an ice bath. 
Viola! Simple, right? Now all you need is some pate choux and you've got eclairs or cream puffs  ;) 


Wednesday, February 27, 2013

I'm back!

Hello! Sorry for the delay! Life has gotten pretty hectic lately. Finally things are slowing down. In the past month I had my first baking job (that's right, HAD). And it's already the end of my Introduction to Baking class.

You might be wondering about this baking job. I worked in a cupcake store as an assistant baker. Basically, my job was to measure things out, sift, clean, make frostings and little things, it was a great beginning baking job. The downside was that I had to wake up at 5am, worked from 6am til 2pm then went straight to school after (3-9pm). It was craziness. Honestly, it was a good job! My coworkers were kind of quirky like me and my boss was a sweetheart. I can't deny my fear of the large amount of estrogen in the room though...it was dangerous. Anyways! That's done. I learned a lot in the whole month I worked in there, ha! For now, while I'm in school, I don't think I can handle another job like that...I'm going to look for a more mellow job.

Intro to baking is almost done, but that's not a huge deal because I'm continuing to Intermediate Baking! Same teacher, some of the same classmates, so I think it'll be fun. I'm ready to move onto bigger and better things.

As far as recipes go on my lil blog baby...I'm working on posting some new ones! I think from now on though, I'm sorry to say, I will post the recipes in ounces & lbs. Real baker style. If you prefer cups and things, you can convert--trust me it's simple. If I can do it, anyone can do it. Seriously, I finished my math career in high school with algebra 2 (and I barely passed).

Woo! So look forward to some good baking recipes!

Oh, and here's a cool thing I found on Pinterest:


Sunday, January 20, 2013

How Sweet It Is


When I think of pie, I think of my brother (and these little egg dudes). He is the pie master. However, I think by the time I finish my fundamentals of baking course...I'll be able to win a pie throw down against him. Wham! Just like Bobby Flay. Nah, kidding! Kind of. But anyways, I'm two weeks into my Fundamentals of Baking class and I'm stoked! We've made chiffon pie, cream pie, apple pie, French silk pie...I feel like Bubba Gump naming all of the pies. But seriously, life has been a baking fiesta lately. 

Let me share with you what I've made so far in the past two weeks.
First off, the pies:


French Silk Pie

French Silk topped with ganache


Lemon Meringue

Apple pie topped with struesel. Yeah, it's not the cutest. But it tasted good...anything with struesel is AMAZING. Butter, sugar, flour and cinnamon. How can you go wrong with that?


Vanilla cream pie with ganache on the bottom and layers of fresh strawberries. Yum!

Now, check out this otha stuff: 

Fruit tartlets

Sour cream muffins

Chocolate chip cookie dough

Soft rolls (bench proofing)

Finished soft rolls

Yellow chiffon cake in the making

Wednesday, December 26, 2012

Christmas Ribs!

It's been a while!

Everything's been super hectic due to the holidays! Visitors, old friends, family, last minute shopping, mini trips, eating food from restaurants I missed so dearly, catching up with sleep...I've been having a good time. And as you all know, yesterday was Christmas! I hope you had a good one :) This year I had the honor of making Christmas dinner for the family. This was a good thing because a) my mom didn't need to panic about the food b) my awesome boyfriend was there to help and support c) I got to choose what we ate. So I chose RIBS. Christmas turkey is overrated. Thanksgiving is turkey day, not Christmas. Who else out there agrees with me?

Oh, and on a side note...the ribs come with a funny story. The temperature change for me has been rough. Going from the 80s to 50s isn't easy for me. So I mostly rely on my old high school sweats (I have no reason to buy new winter clothes when I'm living in Hawaii!). And yeah, I'm well aware that I look like a slob most of the time. But whatever, I'm in Santa Cruz. Yoga pants, hoodies, and Ugg boots are usually good enough. So I walk up to the butcher counter at New Leaf wearing my baggy bright red sweatpants, an old blue Santa Cruz High swim hoodie, and my well-used Ugg boots. I ask him how much three racks of ribs would be. They're around 50$. Expensive! At least from a college student's perspective. So I hesitate and go for two racks. He wraps them up and hands them to me.  "Merry Christmas, I threw some extra's in there," he says to me, sounding real nice and genuine. I didn't stop to think about that until I got home. So when I get home and unwrap them I realized he threw in an entire free rack of ribs. Score! But why? I'm assuming the butcher felt bad for me because I looked like a sad little girl in hobo clothes who just wanted some good quality ribs for Christmas. Little did he know, I'm no hobo, I'm just super lazy. I guess, sometimes, laziness pays off.

Anyways, Merry Christmas nice butcher man! You have some good karma coming your way!

And thanks to my new culinary skills (thank you Chef Leake!) I made some delicious Christmas ribs. Along with honey glazed sweet potatoes, sauteed chard, roasted garlic & chive mashed potatoes, and a yummy salad with homemade dressing.


The recipes are fairly simple. Pictures might not even be needed!

Honey Glazed Sweet Potatoes

Preheat your oven to 375 F degrees. I bought a pre-weighed bag of yams from Trader Joe's. But use however many you need. Cut them up into 1-2" dice (the smaller, the quicker they'll cook!). Keep them in cool water to prevent them from changing color. When you're ready to cook, drain the potatoes from the cold water and put in a large bowl. Squeeze honey over the potatoes to coat them, along with a generous drizzle of olive oil. Sprinkle cinnamon over the top (use your judgement) and fresh ground salt and pepper. Toss the potatoes and make sure they're all coated. Use two foil-lined sheet pans, spread the potatoes out on the sheet pans and pop in the oven for around 30 minutes.

Easy Salad & Dressing Recipe 

I bought a bag of baby arugula (yummy and peppery!) and bag of baby spinach. Mix the two greens together in a large bowl. Add a big handful or two of roasted sunflower seeds. For the cheese I chose ricotta salata (pre crumbled from Trader Joe's), it is SO good...if you've never tried it, try it. It's texture is comparable to feta, because it is crumbly, but it's not salty like feta and it has a smoother mouth feel. I cut up some little grape tomatoes and put those in there, too.

For the dressing, pour about 1/2 a cup (maybe a little more) balsamic vinegar into a bowl. Whisk it up & slooooowly drizzle in extra virgin olive oil until the mixture is thick, like chocolate sauce consistency! Now, grab some honey and drizzle a little in there to taste. Mince two garlic cloves and mix that in there, too. Finally, use fresh cracked pepper and a sprinkle of sea salt to finish it off.

Toss the salad with the dressing right before service! Yum :)


Now for the...RIBS! 


Ingredients:

  • Pork baby back ribs (however many racks you want, I could fit two into my pot)
  • Pickling spices, about 1/8 cup (I looked up how to make my own, easy!) 
  • Dry rub (store bought or homemade); I made mine out of brown sugar, black pepper, white pepper, garlic powder, cayenne, allspice, chili powder, paprika, dry mustard, and salt
  • BBQ sauce (again, store bought or homemade!), I almost used a whole bottle
Instructions:
  1. In your largest pot (and I mean GRANDE), fill with water and the pickling spices then place over high heat.
  2. While waiting for the water to boil, cut your racks of ribs in half. Find a bone in the middle of each rack and cut along that bone. 
  3. When the water is boiling, add the ribs. Cover the pot and reduce the heat down to a simmer. 
  4. Cook the ribs in the pot of water and spices for about 40-60 minutes (my racks were fairly small so I went 40 minutes).
  5. While you're waiting, you can go ahead and make your dry rub. 
  6. Remove the ribs from the pot and set on a sheet pan to cool. Also, preheat your oven to 400 F degrees. 
  7. When the ribs are cool enough to touch, sprinkle the dry rib on and massage it in there (do both sides!). There shouldn't be any chunks of the dry rub, brush them off. You don't want to bite into a big chunk of dry spice rub...yuck.
  8. Use two (more or less, depending on how many you're making) foil-lined cookie sheets to put your ribs on. Then pop them in the oven for 7 minutes.
  9. After 7 minutes, take them out, flip them over & bake for another 7 minutes.
  10. Now it's saucy time! Start with the service side down (the meaty side!), use a small spoon to spread around the BBQ sauce. Don't use huge globs. There should be a nice coating on the ribs, but not huge mouthfuls of sauce. Make sure to cover all of the exposed meat. Pop them in the oven, service side down for 10 minutes. 
  11. Take the ribs out of the oven. Flip them over so they're service side up (the meaty goodness side) and sauce them with your spoon. Put them in the oven for 10 minutes. WOOO RIBS. Done! If you want them a little charred, you can put them under the broiler for a few minutes. 
The meat should be tender and fall right off of the bones. Omnomnommm! 

*Note: ribs can be cooked a lot of different ways! This is the way I learned how to do it in culinary school and I was pleased :) it's a good method to use when you want ribs but it's too rainy outside to barbecue. 

Nommmm away :) 


Tuesday, December 11, 2012

Good Stumblin' Finds

I have a few days left to kill before I fly home. I don't have much to do, so I woke up at 11:30am today...and the only thing I have planned is to go to kickboxing later. I'm not complaining, though, I'm loving the freedom. I can watch Grey's Anatomy for hours, sleep when I please, and go lurk around wherever I want, when I want. And the best part is I HAVE ENERGY! Woohoo! But for now, I'm stumbling on stumbleupon. I discovered this wonderful procrastination tool my freshman year of college. Pretty entertaining stuff!

Oh, the lazy life...

Here's some good stuff I found:

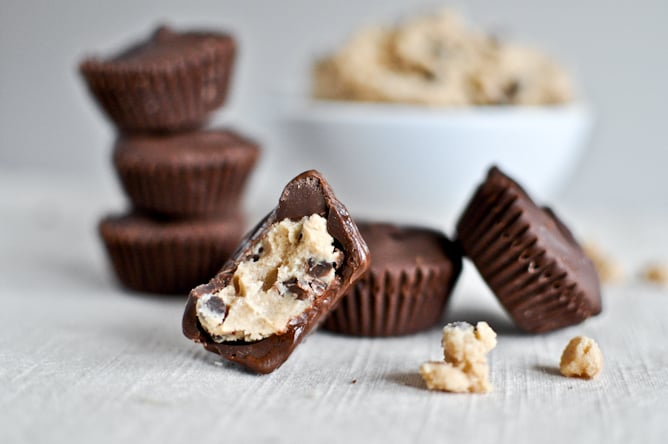
Chocolate Chip Peanut Butter Cups


Cute animals!
Videos & pictures. Look! I promise it will make you smile :)


Pop Danthology 2012 - Mashup of 50+ Pop Songs

Just cause it's almost 2013


Some of the ideas are pretty cool! 
Here are a few examples:

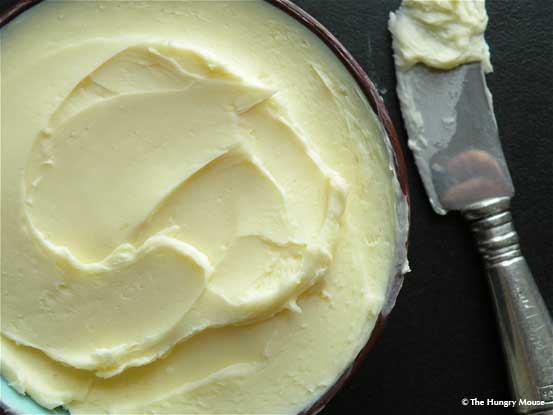
You could add herbs and all kinds of stuff to it! Fancy butta. 
Probably tastes way better than store bought butter.

Hope that entertained you like it entertained me!